Tag Archives: What Makes It Tick

Star Wars Armada: What Makes It Tick Part III

Wave 5 is here and what a fantastic wave it is. Not only did we get the usual new ships & new squads but this wave brings with it Corellian Conflict a new campaign mode for Armada that breathes new life to Star Wars Armada in an epic way.

In Todays What Makes It Tick I will be picking up Star Wars Armada about two waves since my last article and while I could bore you with the reasons why I haven’t been playing, the reality is that with the last couple of waves the game has been reborn and I’m excited about it again. Today I will be talking about some of the more controversial and interesting cards to come out in recent waves. Enjoy!

Bomber Command Center
Coming out of the Imperial Assault Carriers and Rebel Transports expansion packs Bomber Command Center has become the new hotness in competitive meta proving itself at the Star Wars Armada World Champion in 2016 in which both the 1st and 2nd place lists made heavy use of the card. If there is any card you must be prepared to deal with in the Meta in 2017 it’s definitely this one.

The debates over whether or not this cards effect should be stack-able have raged for a while, but officially at this moment the answer is, yes it does stack.

There are so many advantages and ways to leverage this card but the best, most common and perhaps most effective way is to simply spam the shit out of it. While it counts as a “Fleet Support Upgrade Card” limiting it to the Assault Carriers and Rebel Transports, truth is, even if it wasn’t it would still likely be the meta to put them on those ships anyway. These are some cheap, disposable ships that can actually be pretty hard to blow up and as such in most matches they are largely ignored ensuring that Bomber Command Centers remain in play and you are able to leverage them throughout the match.

The ability to re-roll black bomber squad dice is nothing short of overwhelmingly powerful thanks to the dices ability to roll hit/crit results. When running two or three of these ships, not only do you gain an activation advantage thanks to having more ships on the table then your opponent but the effect stacks allowing you to reroll your bomber squad attacks multiple times. Not to mention having disposable fleet blockers. The advantages here vs. the point cost to put them on the table can only be described as dirt cheap.

Cheap with a scatter and capable of some potent upgrades like Slicer Tools and Bomber Command Center, the new transports are a force multiplier that has changed the competitive meta in a big way.

We saw this effect in the world championship final bout this year and there is no question in how deadly this combination is. Flying 8 Y-Wings (80 points!) protected by Intel and some escorts with 3 bomber command centers and what you end up with is a fleet of squads that can practically guarantee 8 hits & 8 Crits every single bloody round. Sure there is the logistics of making sure everything is exactly where it should be during the course of a match. While the pro’s make that look easy, believe me that it’s not that simple, but suffice to say in the right hands this Bomber Command Center supported by a fleet of Bomber based squads is a deadly combination no capital ship can withstand.

Consider the base for the list.

3 Rebel Transports (GR-75 Medium)+ Bomber Command Centers = 78 Points
8 Y-Wings + 2 HWK – 290 = 104 Points

Your base list is effectively 182 with 218 points left to fill out the list.

That base combo is already deadly in its own right, but imagine now throwing in Commander Sato or as the world champion did General Dodonna. It really is brutality unleashed, the potential for damage from this very cheap base is staggering. You would be hard pressed to combine 182 points into something that could unleash that many dice with so many re-rolls and because the dice are scattered over 8 separate rolls, capital ship defense are rendered useless against them.

I would personally advise not spamming Transports, really, one command center is plenty.  The black die is pretty dependable, if you happen to roll a blank once, you aren’t likely to do it twice in a row.  Having a single command center, maybe two should be more than sufficient.  The pro’s might not agree with me, but I work under the assumption that we aren’t all pros, I’m certainly not.  For me, its better to get more effects, ships and squads on the board then it is to put all my eggs in one basket.

Now we could talk about how fantastic this combination is but the truth is that whether you are going to use it, or face it, you need to know how it unravels. How do you deal with such a list and combination of effects? Well that was a question many tried to answer and failed during the World Championship, but I do believe there are a couple of things that could ultimately challenge a list with this base.

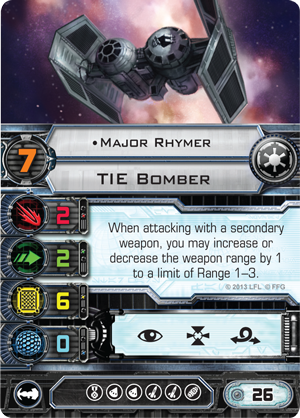
One thing I can say upfront is that you can’t ignore the Y-Wings or really any bomber spam. That just simply won’t work, not unless you plan to stay out of the fight entirely. But unlike the classic Rhymer Ball, you can outmaneuver the slow moving Y-Wings and more importantly leverage the fact that the Transports themselves, while sturdy for their size and point cost can be rendered defenseless with a couple of new upgrades we got in recent waves as well as some old rarely used upgrades. Blowing them up early is the key as without the squadron support and re-rolls, Y-Wings are considerably less effective and can be rendered useless through some clever maneuvering. That however is easier said then that as typically the squads are placed up front so anything that wants to shoot at the transports is going to have to deal with the fighter/bombers leading the battle.

You’ll be seeing a lot more of this one, in particular on ships that are black die focused. Getting accuracies has become vital in the modern competitive meta post wave 4.

For the Rebels a good place to start is the MC30 (Torpedo Frigate) with  H9 Turbolasers. This all but assures that when firing at an Assault Carrier or Rebel Transport that you are going to be able to squash that Scatter and mop up those 3 points of hull in one swift round. Two would be even better. Strategies will naturally vary but you aren’t going to one to come up the front and you probably want to make your opponent split his attention. You definitely don’t want to do what the 2nd place holder did during the championship and go up the front in some vein hope that you can survive the bombings. You won’t, there isn’t a ship in the entire game no matter how you equip it that can withstand 8 bombers shooting at it especially when they can re-roll those black dice multiple times.

The same is true for the Imperials, though it’s worth pointing out that as deadly as this combination is in a rebel list, with a Rhymer ball and bomber based list, a similar list for the Imperials can be as deadly if not deadlier thanks to the range advantage not to mention that Imperial ships are cheaper. So of course while you could counter with Gladiators in a similar fashion as the MC30’s, one way to counter a bomber list like this would be to have your own.

The main strategy at the base of it is to get rid of those support ships with Bomber Command and the best way to do it is to ensure you have at least one accuracy to get rid of its main protection which is the scatter.  This probably explains are worlds champions reasoning behind using 3 Transports with bomber command, he knows that little 18 point transport is the key to his list so he tripled down to make sure he always has those re-rolls.

Suffice to say though this is all very theoretical, as the world champion proved during the competition this year, it is much easier said than done. It’s a very strong meta list and flown well it can put out considerable damage.

Many would argue that Bomber Command Centers are overpowered but keep in mind that they are 8 points which is on the high end in terms of upgrades and they currently must be placed on very soft ships that can quickly and easily be dispatched. Since the strategy is so heavily based on these support ships, you have a very obvious weak point to target.

The new expansion offers us a number of new options but the E-Wing with snipe is finally an answer to those annoying “Intel” based ships.

One other thing to keep in mind is that a heavy anti-squadron based list that can quickly overwhelm the Intel and escorts is also a good option.  Especially in the form of A-Wings and now with E-Wings.  Good anti-squadron is always a good choice in a list as has always been the case for facing heavy bomber lists, but Y-Wings in particular are quite tough and can often win squad based fights so it’s important that your anti-squad suppression is well thought out and preferably using the “Counter” keyword. Don’t presume Y-Wings in particular are easy to kill, they do pretty ok in dog fights in large numbers and have the hull points to outlast in big fights, in particular with an opponent who will be highly motivated to get them back on their bombing run making use of heavy anti-fighter fire from their capital ships.

A-Wings remain a very cheap anti-squadron solution, the ultimate in shutting down heavy bomber lists for the rebels.


Rapid Launch Bays

Another widely discussed card that just entered the frey in Wave 5, discussed not so much for its potential effects on the meta, but more in regards to what the card actually does. Arguably the most poorly worded card in Armada to date, it’s difficult to decipher how it actually works, but today we are going to try.

So let’s look at the wording here.

Poorly worded cards like this makes things difficult, in particular right after release when your trying to run competitive tournaments without the clarity of a FAQ.

The first part I think is quite clear. You effectively set ships aside so that you can deploy them during the match. This in its own right creates a lot of opportunity for exploiting interesting tactics, namely bringing slow moving ships into the fight. There are many slow squads in the game that often have trouble getting into position and this card addresses that issue by not only getting them to the battlefield but keeping them protected (un-targetable) while in the safety of their carrier ship.

The tricky wording in the second section of the card is where all the discussion comes from.

There are three points of contention here.

First is the “you would activate with this command”. The second is the word “Instead” and finally the last part “It cannot move this activation”.

There are really two ways you can read this. The first is that since the card says “For each squadron you would activate with this command you may instead.. do x and y”. This suggests that this is a special action, not governed by the rules of activation. Meaning that the squadron comes into play “not activated”. Allowing you to simply put it into play and set it up for future activation’s.

The card follows up with “It cannot move this activation” which is perhaps the most confusing element of the card. What activation is it talking about? The ship activation or the squad activation. If it’s the squad activation this suggests the exact opposite, that the ship is activated, but it simply cannot move, hence it can attack according to standard activation rules.  Keep in mind that standard rules always apply when their is no specific exception given on a card. If it’s a ship activation on the other hande, it suggest that its not activated but since its not, you should with another squad command point you be able activate the ship and attack, but still can’t move.

The general two questions here are, is it activated and if so while we know it can’t move, can it shoot? That’s the big debate. Activated or not and can it shoot or not.

The answer is at best inconclusive and it has been so far ruled in a number of different ways, though none of them official by FFG. While an explanation is sure to come at some point, for our house games and in particular if you are running a tournament we still need to answer this question.

My general sense of the card is that in the last part where it mentions “It cannot move this activation” is a reference to the ship activation, not squad activation. The logic here is that the spending of your squad command points during the activation can be split up, some of the points going to activating squads normally and others using Rapid Launch Bay.

I think it’s best to see it in action with an example.

Lets say you have an Assault Frigate with 3 squad points and a squad token that has 2 B-Wings stashed away using Rapid Launch Bays.

The slow moving B-Wing suffers greatly as a result of its slow speed, rapid launch bays addresses that problem.

You activate the ship and reveal a squad command. Now its time to spend the points. You spend the first two points to put out your B-Wings in distance 1 of the carrier. They are not activated, this is all you can do with those two points, however you of course have 2 points remaining (one from the command and one from the squad command token). You now activate your B-Wings using your remaining two points, now since it’s still the same ship activation you can’t move them, but you can attack, so if you had ships in range you can attack with the B-Wings.

I believe this is the intent of the card, now of course this is not official and some including myself would argue that in the last part of the wording of the card it could be referring to squad activation which would suggest that you could use a single squad point to put out a B-Wing, activate it and attack (but not move). However I would argue that if this was true, this card would be stupidity over powered at only 6 points. You could in this case have 4 B-Wings stashed away, put them all out and attack with all 4 of them in a single action, with Extended Hanger Bays and a squad token you could do this with 5 B-Wings. Throw in command centers and you’re talking about a card that would completely redefine how the game is played. Even in the first scenario this is a very powerful effect but in the second scenario it’s just way out of hand. While you might be able to argue the translation, it would be hard to justify the power of this card in the scope of the game and its ultimately because of the question of balance, I believe the card will likely be ruled as our first example not our second.

Currently in most tournaments, including local regionals the first scenario is being used, it’s what I would recommend you use until the official FAQ is released.

Rebel Pelta Class Command Ship

The Command version offers 3 squad command and a offensive retrofit, setting it up to be a focused support ship.


The Assault version gives us red/black dice with 2 anti-squadron fire and a ordinance slot, making this a more shooty support ship.

Ok so let’s talk a bit about the new ship, specifically the Pelta Class Command Ship which is definitely the one I’m personally most eager to try. Finally we have joining the world of Armada a proper pure support ship that can affect the battle field on a global level. Now we have had quasi support ships in the past like a Redemption, Projection Experts fitted Nebulon-B or the more recent Rebel Transport with Bomber Command Centers, but the Pelta is different. It has no range qualification for its Fleet Command slot as  these global effect driven cards simply require the spending of a token.  In that little slot a lot of magic can happen opening an entirely new world of options for list building. This however is just one small part of the Pelta.

The first thing you might miss, but is important to note is the 4 engineering on a small ship. This is important because this ship will largely want to stay out of big fights and given its slow speed and maneuverability, being able to take a licking and keep on ticking is important when those flankers show up. 4 engineering means 2 shields each round without any special tokens or support and given its 3 on the front, 2 on the side and 1 on the back configuration and the fact it has 3 defense tokens (Brace, Re-direct and Evade), this is a sturdy ship with good recovery for its class. No one is going to come around and just melt it like they would easily do with a Nebulon-B fitted the same way.

More importantly it has a Support Team slot which means it can make use of Projection Experts when it’s not being shot at, sharing the wealth and further qualifying it as a proper support ship.

The fact that is boasts an Offensive Retrofit might have you scratching your head but thanks to gear like Phylong Q7 Tractor Beams, Rapid Launch Bays and Engine Techs you have serious versatility in choosing this ships role and capabilities.

Now the cost on this ship can get crazy quickly and you probobly don’t want to try to combine too many effects on it.  Its best chose to serve a very specific role, though more than any other ship in the game, its role can very dramatically depending what upgrades you put on it.  I think its for this reason more than any other that I’m already in love with the ship.

This is largely an untested ship though and so its honeymoon period may be short but it’s not hard to see the benefits of cards like Shields to the Maximum, All fighters follow me and Entrapment Formation. With no range requirements you have what amounts to the first truly global effect on the battlefield able to reach everyone always. You can effectively build entire lists around these core concepts and that in its own right I believe will be well worth the investment but the truth is that unless a ship can fight or add something to a fight on its own its usually not worth putting into most lists.

Spending a engineering token to give every ship in your fleet one free shield for 6 points is a fantastic trade off, especially in a game where every shield point counts.

Thankfully for that purpose we have the Assault version of the ship, a far more shooty version that one can draw comparisons to the Gladiator.  In the assault version you gain an ordinance slot that can be leverage to throw in some additional fire power while still offering the core support features of the Pelta.  For the aggressive minded player this is a fantastic alternative to the more focused command version.

Some Musings

I truly believe that much of what has come out in Wave 5 is geared more towards the new campaign mode in mind than 400 vs. 400 point pitched matches and I believe the Pelta is one of those elements. Consider that Shields to the Maximum for example affects all “friendly” ships. That includes your allies when doing an all-out offensive during the campaign. So suddenly the impact of that command ship is even on a grander scale!

Its more than just the ship though.  In the campaign mode you are always thinking about the war, not just the individual battles.  You are also always thinking about the survival of your different ships and squads and as such you are likely going to be looking at upgrades and list selections very differently.  Equipment like Rapid Launch Bays can protect squadrons and offer you a choice as to when and even if you really want to risk them in a particular battle.    The choices and reasoning behind making them are going to change in the campaign and I believe a lot of what we got in wave 5 supports that.

My point is that I can’t say for certain that things like Rapid Launch Bays for example will be a thing in the competitive meta in 2017, but you can definitely expect to see them in the campaign as its clear the uses there are more defined.

That’s it for today’s article, hope you found something useful in it.  Fly Safe!

Star Wars Armada: What Makes It Tick Part II

In my last article I kicked things off by looking at the Nebulon B and sort of doing a thorough assessment of a single ship. Now part of the reason I did this is because, in as a whole I feel in order to become a good Armada player you really need to look deeply under the hood of every ship, every upgrade, every mechanic etc. in the game. Hopefully that article presented a sufficiently thorough investigation into one ship that might trigger readers to look at others with the same vigor.

My next article in the series I attribute to the relentless ass whooping’s I have received since I started player Armada. Despite all the frustration, confusion and failed attempts at becoming a good Armada player what I have found is that from failure comes the greatest gains. In today’s article we are going to look at some of those lessons. Some of it will be very specific, some very theoretical but for me its all-golden lessons learned through the very gratifying art of utter failure.

Don’t forget to assess your opponents list

This really is one of the most common reasons why I have lost games. I get to the table, excited, full of energy, I just want to get those ships on the table and start the epic strategy I have contrived after days of staring and thinking about my own list. In the end however no matter how you analyze your own list, the reality is that you are not going to win because of your list, you are going to lose because of your opponents.

When facing a commander like Screed you are going to have to adjust your thinking, failing to do so will put you at a huge disadvantage.

Knowing what your opponents list strategy is, what his individual ships can do, what combo’s and synergy he has and how that affects your list is absolutely vital to know long before you start setting down ships. You have to take the time to look, asses, think and adapt to your opponents list. This tip alone as seemingly obvious as it is, is actually almost never done. Even in tournaments it’s rare for my opponent to even ask me what I have, let alone actually come around the table and take a moment to look. Doing this improves your chances of winning dramatically, don’t ever forget!

Accept the Meta, Embrace The Imbalance

Meta’s always form, whether it’s the general competitive tournament meta, your local game shop or group meta or just casual games between you and your one friend. You have to adapt to the formation of metas and simply accept that in most cases meta’s are formed out of imbalanced elements of the game or more typically perceived imbalances. Players are going to try to find the best, most effective ways to win matches and the foundation of that is always going to be based on select elements of the game due to their efficiency and impact. In a sense this creates exclusion of many components of the game, while creating a sort of automatic selection of others. Not always a terribly fun approach to a game, but ignoring it is really is shooting yourself in the foot. Besides, meta’s change over time and it’s in this constant adjustment where the best players thrive, to be one, so must you.

Is he OP? I don't know, What we do know is that a lot of people are running him and he is part of the meta, so adjust accordingly.
Is he OP? I don’t know, What we do know is that a lot of people are running him and he is part of the meta, so adjust accordingly.

It’s more than just understanding the meta though, its actively building lists and preparing yourself to respond to it. It’s really easy to throw your hands up in the air and proclaim something OP, but the purity and joy of overcoming a challenge by cleverly built lists and executed strategies is a feeling like no other. Challenge yourself to unravel the puzzles the meta presents and find solutions to overcoming it. Not only will you become a superior player but you are going to distinguish yourself because very few people get too far beyond filing complaints on the forums where their tears are collected by better players. If you must bitch, do so among the company of better players who if you are lucky will pat you on the back, offer advice and inspire you to try again.

Squads are vital, Don’t Ignore them

While I think there will always be effective ways to build all sorts of interesting and unique lists that exclude fighter squadrons, I believe they are really a core element of the Armada mechanic at this point. The game is really centered around the assumption that you will have fighters and the way fighter squadrons affect the game is in essence a sort of secondary battle which when resolved will allow the victor to push through to the heart of the main battle quickly turning the tide. In every match of Star Wars Armada I have ever played, in the end, when I asses the game I always come to the same conclusion. Fighter squadrons Impact and contribution is as vital as any capital ship. I have never played a game where squadrons didn’t play a key role in the victory of a game or the minimizing of a loss. Ignore them at your own peril but if you take any wisdom from this article, know that squadrons are like an insurance policy. You might not always need them, but not having them when you do is usually quite devastating.

The secondary battle of any match is the squadron battle, if you don't bring squadrons you don't get to participate. Its like an early Christmas gift to your opponent.
The secondary battle of any match is the squadron battle, if you don’t bring squadrons you don’t get to participate. Its like an early Christmas gift to your opponent.


It’s a game of maneuvering, not dice

Oh this is so hard to admit and so difficult to accept, especially for an unlucky bastard like me. It never fails that you pick up a handful of dice, watching the look on your opponent as he awaits his inevitable fate only to find heart ache on the table. The dice gods are cruel and we curse them for their insolence.

Yes, dice do matter but if you end a match and blame the dice for your loss you will never, ever, be a good Armada player. Oh it’s hard, I know, believe me, if anyone has a complaint to file with the dice gods it’s me. In the end however no matter how you analyze, no matter how much you calculate and how much time you spend in church praying, its maneuvering not dice that will lead you to victory.

Dice stats do matter, but if you are basing your strategy on it, your gambling.

This is first and foremost a game of maneuvering and it’s a rare match indeed that you can’t trace back to tactical maneuvering errors. Sure builds are important, global strategies are important and certainly if you are just rolling blanks things aren’t going to go well. Maneuvering however is the great equalizer, it’s how you deny your opponent opportunities and create them for yourself. There is no better method to improve your game than learning to control the plastic on the table. Getting those ships into their arches, managing ranges, precision timing and the ability to think a turn or two ahead are all priceless skills.

More than that though as you learn to maneuver and become efficient at being exactly where you want to be, it opens doorways to new builds, to understanding advantages of less common ships and equipment and above all else it allows you the luxury of creating more efficiency within your lists as you won’t have to compensate for your own errors.

No question in my mind that if you learn to do nothing else but maneuvering like a pro you WILL win games.

Don’t give up

I’m not referring to Armada in general but specifically matches that have gone badly or turned on you. I have found that in Armada it’s not over until the fat lady sings and while sometimes you can have atrocious setbacks, every new round offers an opportunity for your opponent to make a mistake and you to make a comeback.

I have seen opponents rise from the grave and I have watched my self fall from seemingly impossible heights. If you stick it out, re-asses and continue to look for opportunities you stand a solid chance of finding them and making a comeback and this isn’t just some motivational or inspirational suggestion, it’s an object fact in Star Wars Armada for mechanical reasons.

It’s difficult to explain, I will do my best here. The thing about Armada is that setbacks usually take place for one of two reasons, your opponent executes a well laid plan and it worked, or you made a mistake and gave him an opportunity that he ceased. The thing about Armada is that everything always has a drawback, regardless of how the success was given birth. There is no action you can take that won’t ultimately present consequences for taking it and at its core this is why Armada is so mechanically well balanced.

Whatever advantage a ship has in one round, will be undone because he took that action in the next and this is the part you have to see on the board to understand how you will take advantage of it and turn things around. Every ship in particular has an optimal position that they are trying to get themselves in but ultimately that position will become a liability in future rounds when it has passed. Sure that Demolisher can shoot, move and shoot which can have deadly results for you, but he has to move and that position he is in when the smoke clears, is your new advantage, cease it.

Point here is that everyone eventually has to expose their weakness but it can be hard to see through the tears of a previous disaster, you have to wipe them away and look for the opportunities that result, they are probably staring you right in the face.

Strategy and Planning around the dice

Ok so I already said the game is not about the dice so this may sound contradictory but you do in fact have to have some sort of plan on how to handle dice because they are part of the game. You have to understand the threats and opportunities on the table and those are often represented by the potential of the dice. Here is how I see them.

First and foremost the black and blue dice you have to see as guaranteed hits, meaning when you are planning your strategy just presume whatever amounts of dice are being rolled, that is how many hits you can expect out of blue and black. This is a very statistically inaccurate way to look at it, but if you walk into a match with this belief and you make decisions based on that assumption you are going to be a lot tougher to beat.

Never roll red die at medium or short range, if you do, you’re doing it wrong. Ok again, hardly a realistic assessment, or even realistically possible to do but it’s how you want to see the use of your ships that are focused on red dice. Your job is to play keep away, you want to roll red dice without getting blue or black dice thrown at you from your targets. Clearly an impossible task but again if you approach the game with this attitude you will be a lot tougher to beat.

Always work on the assumption that your opponent will roll better than you. This is my favorite piece of advice because it mentally prepares you for what the game typically feels like even though statistically it’s probably not true. Aggression can and often will be rewarded, but reliance on out rolling your opponent NEVER pays in anyway shape or form. The game is about strategy, not gambling on your ability to roll dice well and don’t trick yourself into calling it “risk”. It’s not risk if you’re praying for good results for yourself and bad results for your opponent. Again, it’s a game about maneuvering so your job is to deny your opponent opportunities first and create them for yourself second. If you create opportunities for yourself while setting up your opponent for his you aren’t creating a strategy, you are worshiping at the altar of luck. Trust me, it’s worse than scientology, it’s a path that leads nowhere.

Finally don’t build lists driven by statistical dice assumptions or explosive possibilities. For example a Salvation with Slaved Turrets and a concentrate fire lets you roll 5 dice. That’s fantastic, but if the only reason you added that ship to your list is because you might get 5 double hit results for a staggering 10 damage be prepared to be disappointed. Don’t build strategies based on rolling dice because dice will disappoint you. Build strategies on consistency, reliability or as part of a larger tactical plan. For example the Salvation might be perfect if combined to be part of a larger strategy in which the reliance is less so on the dice but on the tactical maneuverability and advantage of the Nebulon-B. Rolling 5 dice and getting 10 hits, great!!— if you get them, but if you don’t, your strategy shouldn’t suddenly fall apart as a result.

Its a great card and it can sometimes pay off, but its nothing to hang your hat on.
Its a decent card and it can sometimes pay off, but its nothing to hang your hat on.

The Golden Rule

Ok this is a bit cliché but don’t forget that it’s a game and you are there to have fun. Competitive or casual it makes no difference, if you don’t like the list your running or the strategy you have built you aren’t going to win no matter how well thought out it is if all your trying to do is just get it done so that it’s over. The best players are always the most enthusiastic ones; those that love the game and want to be there win or lose. All and all victory is sweet, but it can leave you bitter if you didn’t enjoy earning it!

I have to admit that I don’t always take my own advice but I’m never surprised to find myself losing a match, then going back and making the stark realization that if I had, I probably would have done a lot better. Still I really believe in the advice presented here, I honestly think that if you follow it you will win more often and enjoy the game a lot more.

Have a great weekend, Nerd out!

Star Wars Armada: What Makes It Tick Part I

The X-Wing what makes it tick articles have been tons of fun to write but right now in my local gaming area it’s really all about Star Wars Armada. I like to write about what I’m thinking about and playing at any given point and since this blog is really my canvas it suits me just fine to write some articles for Star Wars Armada. Now I will admit that I’m a lot less comfortable about putting out what makes it tick articles about Armada than I was about X-Wing because I’m definitely no master of Armada, not that I was in X-Wing either but it was certainly a game I played a ton more before I started writing. I have a couple of tournaments under my belt at this point none the less and while I consider myself “still learning”, there are definitely some conclusions I have come to about the game.

With this first article I’m going to tackle one of the most commonly discussed aspects of Armada for Rebel players. The one that I find myself in discussions about regularly is the value of the Nebulon B ship for the rebels. The discussion is always about effective uses for this ship in a fleet, whether or not it’s worth it point wise and how it can contribute in competitive play. In a recent tournament I participated in out of 10 lists there wasn’t a single Nebulon B other than the one I put in my list, hardly a full analysis of the current meta but it certainly says a lot about the Neb-B’s status in competitive play at least in my area. I thought I would kick off the article series by exploring this rather iconic rebel capital ship.

nebulon-b-escort-frigate nebulon-b-support-refit

The Nebulon B Problem

The Nebulon B is probably the most difficult ship to keep alive over the course of 6 rounds of any ship in the game, in particular when using the Salvation title card which needs to enter the fray to make use of its Title ability. It’s a really strange combination because it has both the best and the worst defenses of any ship in its class as well as the best and worst weaponry of any ship in its class. It also has some real vulnerability to select types of equipment that can just utterly devastate it while being ridiculously effective in select situations. It’s a real quandary, the kind of ship that can be a game changer in some situations and absolutely useless in others.

With 2 brace and 1 evade token it’s a ship that can mitigate damage extremely well under normal circumstances, better than any other in the rebel fleet without any special equipment cards. It has 3 shields when facing with its front arc which is extremely good considering its dirt cheap price. As well that front arc has real potential to do a ton of damage when combined with certain title and equipment cards, it really can out shoot far more expensive ships, in fact it’s been known to out joust victory class destroyers.

For Star Wars fans, the Nebulon-B is an iconic capital ship that draws us to it on theme alone, but how much value does it really have mechanically in the game?

The problems for the Nebulon B however are its extraordinarily vulnerable side arcs and the fact that in order to leverage that defensive and offensive strength of your front arc you have to be moving towards your enemy which in turn means at some point you are going to have to pass your opponents ships and expose your vulnerable sides. From the sides the Neb-B neither shoots well or defends well. With only 1 shield on its side it goes down shockingly easy once enemy ships set their sights on them and you aren’t going to do a whole lot with 1 red and 1 blue die when shooting even with equipment boosting them. It’s in particular vulnerable to commonly used equipment like Assault Concussion Missiles and Heavy Turbolaser Turrets and let’s not forget squadrons which can melt a Neb-B with very little effort.

This drawback is extremely difficult if not impossible to manage, really in a sense if you want to leverage its firepower you have to see it almost as a suicide ship.

Or do you?

I think in large part the current presumptions about the Nebulon B are largely driven by its miss use tactically and it’s really not surprising since it really functions opposite to everything a Rebel player would learn and understand about maneuvering and tactics with the Rebel fleet. I think Imperial players might have a better understanding of a front loaded ship. It’s a ship that is used in the exact opposite way of every other ship in the rebel arsenal, but more importantly it’s a ship that has extremely specialized uses and combinations that require very special care to both pull off and survive afterwards.

More than that though a Nebulon B ultimately borders on being useless without an investment so if you’re looking at the low cost of the Nebulon B and you are tempted know that a properly fitted and used Nebulon B is going to cost you about as much as a base Assault Frigate. You are far better of taking a Corvette for pretty much any purpose over a naked Nebulon B. So this is the first lesson in the use of the Nebulon B. Never, ever… ever use him naked. Of that I’m 100% certain.

A Nebulon B is only as good as the equipment you put on it and it begins with the Title Cards. There are 3 and as such there are really only 3 versions of the Nebulon B (with some subversions based on those core versions). You have the Salvation, Yavaris and Redemption, not having a title card on a Nebulon B is a waste of points, always, no exceptions.

yavaris salvation redemption

The Versions of The Nebulon-B

There are variations on the Salvation build but typically you are looking to maximize your front arc shooting.

With the Yavaris you are effectively a support carrier, usually supporting specialized squadrons that can really make use of that double attack.

Finally the Redemption turns the Nebulon B into a mobile repair platform and support ship.

The Salvation

The standard tactic of the salvation is to arrive to the fight late shooting at already diminished fleets. By leveraging its doubling effect of the critical hits and the defensive front arc combined with two braces on the approach you have both survivability and considerable damage potential. After you strike you will be flying past the fight using its speed and maneuverability, hopefully using its rear arc and braces to escape and survive.

Putting him in a flanking position on deployment and gaining a Nav token is critical in round 1. You also want to make sure as he enters combat he does so by getting into long range and moving at speed 1 so that your approach is slow. Your primary fleet whatever it is, should already be engaged laying down fire on the enemy and softening up shields so when the Nebulon B gets into range it can attack ships that are already damaged.

Than after a round or two when you are about to clash with enemy ships and you are going to pass, you want to ensure you time it right to get a navigation command to speed up spending the nav token you held on to from round one to go from speed 1 to speed 3 in the same round, adjusting angle to ensure whatever shoots at you, shoots at your rear shields.

Finally making use of your speed 3 and double yaw you want to immediately start U turning yourself back into the fight.

With its side arc facing a Victory Class this Nebulon-B is in a lot of trouble.

Sound easy? It’s not, it’s so extremely circumstantial that odds of your Neb B making it out alive is slim to none, especially in a tournament where the Neb-B will be seen as an easy way to score points. The truth is that this first pass is likely to be your last so you have to make it count. There are however benefits to the Neb B being exposed. Someone is going to have to shoot at it and while they are shooting at the Neb B, they aren’t shooting at your other ships. 5 Hull is not that easy to chew through when a ship has two braces either so be sure that while your Neb B is getting ripped apart the rest of your ships are tearing into the enemy fleet and making good use of the redirection of firepower. That said, with certain ships and equipment, the defenses of the Nebulon B are worthless, Assault Concussion Missiles in particular will make short work of a Neb.

The real problem with the salvation as an advantage is that it’s an entirely luck driven advantage and the odds of it going off are not very good considering your investment and the almost certain loss of the ship. Statistically you have a 2 in 8 chance per die to roll a critical hit. Regardless of how many dice you roll, the odds of rolling a critical are offset by having the same odds of rolling a miss. It’s really a wash in that regard so you are really gambling here. Even with a concentrate fire and added turrets your average damage is not going to exceed 3 to 4 unless you get lucky. Not bad if the ship could survive and get more than one or two shots in a fight, but given its vulnerability you really have to question the investment on something so luck driven and ultimately fated to explode.

I don't like to get too mathy, but doesn't take more than a quick glance to realize your chances of rolling a critical are as good as a miss statistically offsetting the Salvation ability to turn Criticals into double hits with an equal chance of missing.
I don’t like to get too mathy, but doesn’t take more than a quick glance to realize your chances of rolling a critical are as good as a miss statistically offsetting the Salvation ability to turn Criticals into double hits with an equal chance of missing.

The Salvation can be a real threat if you roll well, which is true of any ship, but it has absolutely nothing else going for it beyond that and the point investment to make it a threat is about the same as buying a naked Assault Frigate. A naked Assault frigate will last longer in a fight and likely put out more damage than a fully loaded salvation.

I personally believe the Salvation version of the Nebulon-B is the weakest of the three versions for that reason. It’s entirely luck based focus and it’s really inability to help your fleet in any other way make this a gamblers ship.

While there are variations on a typical Salvation build, the most effect one would look something like this.

Nebulon –B Support Refit
Salvation
Intel Officer
Slaved Turrets or Heavy Turbolaser Turrets or XX-9 or XI7 or Turbolaser Reroute Circuits

Which turrets you use will have various effects on different types of lists. Typically you won’t know what you will be facing hence Slaved Turrets are best to simply get extra dice. The combination of Intel Officer and Heavy Turbolaser Turrets is great against the brace heavy empire putting your opponent to a really hard choice. X17’s are great to prevent redirects especially effective against Rebel Assault Frigates counting on those Advanced Projectors. XX-9’s are wonderful for dishing out critical hits, great combined with Dodona in particular if you stick to the strategy of attacking late in a fight. It’s all very good and really up to preference, regardless of which one you choose you need one on the Salivation to really stretch the effectiveness of that one or two attack rolls you are going to get with it before it likely dies.

Intel officer is a great way to make your opponent pay dearly for using defense tokens. The more hard choices your opponent has to make the more likely he is to make a critical mistake.
Intel officer is a great way to make your opponent pay dearly for using defense tokens. The harder choices your opponent has to make the more likely he is to make a critical mistake.

The point of the build is to ensure that when you maneuver into combat you are concentrating fire and rolling at least 4 dice, potentially 5 with salvation effect, intel officer effect and the effect of your laser turret which in combination can (if you’re lucky) be completely devastating especially when firing at a damaged ships. With good timing and maneuvering you will be in a position to do this two rounds back to back before you have to make that very risky pass exposing your side arc.

It’s good to point out that the Neb B can be sacrificed to cause additional damage by crashing into stuff and blocking movement if it’s lucky enough to survive added volleys in subsequent rounds. Suffice to say the suicide salvation can cause a lot of chaos and in a way this can be an effect of its own on the fight.

For me personally though the Salvation is a hard pass, its too many points dumped into a ship that is marked for death, in particular for tournament purposes where points are involved. On average it has been my experience that this ship just has far too little impact on a match to justify. I have never been lucky enough to see it cause the havoc the ability of the Title card suggests its capable of. In short, it looks good on paper, but fails in practice in my opinion.

The Armada battlefield can very quickly become completely chaotic, in an environment like that, the Nebulon-B can easily be picked off. This reality is one of the reasons why the Salvation Nebulon-B in particular is tough to survive with.

The Redemption

The Redemption build is really built to frustrate your opponent. It’s basically a ship that stays completely out of the fight but has a very noticeable impact on combat results by not only supporting the rest of the fleet with heals and tokens, but also potentially coming into the fight at the end to put those front arcs to use. This makes this version of the Nebulon a lot more versatile.

The strategy is simple. Keep your redemption Nebulon-B out of the fight at a maximum range that you can maneuver from your fleet but remain in range to use your primary ability. Hang back and repair ships that are in the fight while helping to manage the battle with command tokens.

The Nebulon-B is not the only ship that can leverage projection experts, but the Redemption is particularly suited for this task.

This strategy is exceptional with Assault Frigates, MC30’s and especially the MC80 which can be rendered nearly invisible with Redemption in range.

The Redemption Build

Nebulon B-Refit
Redemption
Leia Organa Or Raymus Antilles
Projection Experts

The Redemption effect works on you as well as other ships so while its already helping the rest of the fleet by providing 1 more engineering for everyone (because everyone should always be within range 5 of you), it also gives you a total of 4 engineering. Leia Organa is great because you will be spamming engineering tokens hence you can pass an engineering command to ships that take too much heat in the fight regardless of their command level. This allows them to fix themselves in addition to the help you’re going to pass on with Projection Experts.

Projection Experts are going to be passing 2 shields each round and you will use the remaining 2 engineering points to recover 1 shield giving you a net loss of 1 shield each time you use it. In the first round you are going to pick up an engineering token so the first time you pass 2 shields you can recover them both with an engineering command and the token. It will take several rounds to really deplete the Nebulon B and frankly it really shouldn’t need them because it should be well away from the fighting anyway.

The alternative here is to use Raymus Antilles, which effectively allows you to pass 2 shields and recover 2 shields every round. I prefer Leia because you get more overall healing to you primary fleet by passing engineering commands. The Neb-B losing a couple of shield over the course of the match is really no big deal, besides it makes for a cheaper build.

Imagine the scenario here. You have an Assault Frigate that has its side shields down and 2 damage on the hull. The redemption kicks in with an engineering command. Leia changes the assault frigates command to engineering. Redemption passes 2 shields to the Assault frigates side, then the redemption recovers 1 of its shields. Then the Assault frigate acts. It has an engineering command, with 4 engineering it removes 1 damage and shifts one of its shields to the side arc from an unexposed area. Suddenly a ship with no shields on its side and 2 damage has 3 shields and 1 damage. If you take an engineering token with the Assault Frigate early, the recovery from the initial engagement can be even better.

With 2 shields coming from redemption and 2 more that it can produce itself, the MC080 becomes an insane tank even without any defensive equipment.

It’s extremely effective and frustrating for your opponent to watch all that damage get recovered. The redemption should really be called the demoralizer because that’s really the effect it has. This build is definitely approved, it’s easy to use, works reliability and best of all it doesn’t require to put the Nebulon-B in harm’s way.

The Yavaris

The Yavaris is a force multiplier and itself can be an amazing support ship, but requires expert skill (which I don’t have) to use. In fact, I would say avoid using her until you really get the hang of managing squadrons because to use Yavaris you have to understand how to do that well in addition to all the specialized consideration of getting her effect to really pay off. One small error in judgement with this ship and your delicately balanced build will cluster fuck into oblivion.

Yavaris should only be used with named pilots, that’s the first piece of advice. It’s an expensive toy on the board and you want to make sure whatever squads will get those double attacks will be able to maximize their impact on the field. An exception might be B-Wings.

The real trick to Yavaris is to understand that it’s a support carrier not your main carrier and in most fleets that use Yavaris, it should be a late arrival ship. You want those two or three fighters that it’s supporting to come late into a fight to shoot at ships that are already damaged to sort of finish them off. This is for two reasons.

Luke Skywalker is one good choice for Yavaris, but think about how much damage this guy can do with a double shot.

First it’s because the Yavaris is still a Nebulon B, which means you have to soft side arcs and since your managing squadrons you are likely to be put in a position to expose those arcs when you commit to ensure you are in the position you need to be to manage fleets. So you want to come in late into a fight to make a less tempting target. The second reason is that typically the squadrons Yavaris supports are going to have black dice and be bombers, so you want to be throwing those dice against ships with their shields down so that when you roll a critical hit it takes rather than bouncing.

That means that you need other fighter screens and ships capable of managing those squadrons to be up front keeping your Yavaris and its precious squadrons safe. It’s all very complicated and I feel inept here, I don’t feel comfortable really advising on tactics using this ship because either the Stars have to align for this work, or you have to be a fucking maneuvering tactical ace. In fact, it’s precisely because it’s so complicated to use that I don’t use it. At least not yet.

There are variations on the build as well and it’s hard to say which is best, I suppose it comes down to price.

Nebulon-B Escort Frigate (always for the 2 squadron command)
Adar Tallon or Raymus Antilles
XX-9 Turbo Laser (optional)

You must always take the Escort for the extra squad command and the 2 Anti-Fighter attacks. This will help you to clear for your squadrons if need be and of course to allow you to manage a minimum of 2 named squadrons.

Adar Tallon is really good as it can get you a 3rd attack with one of the squadrons in later actions or the squadron phase, this can be in particularly deadly if you combo it with Luke Skywalker for example. Personally I think it’s a little too pricey just to squeeze out one more attack. Raymus Antilles is the better choice in my opinion, it allows you to pick up much needed navigation tokens, extra squad commands and if you actually do get a firing solution you get that extra re-roll. He just works well with anything really. You can also do without either for a cheaper build and I actually think that might be the best version. After all, it’s a Neb B and you will be putting it in harm’s way so it getting blown up is a real possibility, quite likely really.

The XX-9’s are optional but personally I think they are just perfect if you adhere to the rest of the strategy here. You are coming in late, you have squadrons doing double damage on your target during squad activation hopefully by the time you get to the shooting phase the shields your shooting at are going to be down. It can be a real finisher and it’s quite cheap.

Conclusion

I firmly believe that the Nebulon-B is a very difficult ship to use well, but in a sense Star Wars Armada battles are all about risk vs. reward management. There are few guarantees and anything you put on the table is going to have its drawbacks. The Nebulon-B when fitted with purpose and used to good effect, sometimes with a bit of luck can be a real game changer. It never ceases to surprise me how something as seemingly insignificant like a well-timed Engineering Token, or well-orchestrated maneuver can quite literally mean the difference between a crushing defeat and an overwhelming victory. Star Wars Armada can really swing and ships like the Nebulon-B that are well equipped can really turn the tide of a battle.

Still that said, of all the ship in the Rebel arsenal I think the Nebulon-B comes with the greatest risk of backfiring on you. It’s a very unforgiving ship, one small mistake and your toast which is why I typically use it very sparingly. It’s certainly not a ship to build your entire list around, but it’s cost effective enough to splash in there for an extra boost in very specialized areas.

I have very little confidence in luck based mechanics so of all the Neb-B builds, I think the Salvation is perhaps the riskiest but provides perhaps the greatest reward while the Redemption is undoubtedly the most reliable yet pays in moderate dividends. In a way that is the center of balance for the Nebulon-B, it really runs the spectrum of risk vs. reward. Amidst there you also have the Yavaris which I think is perhaps the most specialized and most difficult to use ship and again, I think this is a nice feature as it gives players who get deeper into the game and have more confidence an option to take on some more complex builds that use more complex tactics.

I whole heartedly disagree with the current Meta assessment that the Nebulon-B is somehow useless or doesn’t carry its value. It really offers something for every type of player, whether you like reliable low risk ships, if you’re a high risk gambler or if you are looking for a deeper tactical challenge. The Nebulon-B fits the bill for all three types of players, giving everyone something it can be used for and I think that makes it a really great ship in the Rebel fleet.

I doubt I hit on every point here with the Nebulon-B but hopefully there is sufficient information here to give my readers something new to try with the ship. Good luck in your battles and keep an eye out for future What Makes It Tick articles for Star Wars Armada.

WHAT MAKES IT TICK: STAR WARS X-WING PART VI

Seeing as the last article triggered no less than 19 E-mails with questions and comments regarding ordinance I thought I would ride the momentum and write another one addressing one of the questions most of these e-mail more or less implied. Keeping in mind I’m no master or final authority on the topic, here goes nothing.

Question
Is there any ordinance that is a notch above the rest or better in some way? Something that might not be labeled as “useless” or “not worth it”?

Answer
In my personal opinion I actually think most ordinance is quite a big notch above primary weapons. I think the thing about ordinance is that you typically have to make an ordinance list and create synergy to gain the full value of ordinance and it’s in this element costs mount and you really have to weigh lists against the alternatives. You definitely can’t simply splash ordinance into a list in most cases. You are effectively creating a list built around a strategy driven by the type of ordinance you have selected. I have also noticed that many people miss-read and miss use ordinance, often skipping over a critical element of a piece of ordinance, something I have often been guilty of myself. I think perhaps a more specific breakdown could be helpful. My point however is that I don’t actually believe ordinance is bad, though I do agree that it requires a lot of scrutiny and there are quite a few limitations and “on the fence” points where you really have to consider value vs. alternative.


Torpedo’s
TorpsTorpedo’s were effectively the first ordinance introduced into X-Wing in the original core set. Torpedoes typically require you to spend your target lock, so they put you in a position where you might be rolling dice without a focus token which is typically bad. It’s especially bad for one shot items that cost between 2 to 6 points. When it comes to torpedoes as ordinance you are pretty much always looking to create synergy effects to help ensure that when you shoot you get your points worth in damage caused. This is why early ships like Garven Dreis and Dutch Vander where such a great combo for using torpedoes. The question is are they worth it, well, yeah, I think they are.

dutch grave

In this synergy combo Dutch Vander target locks, which in turn gives Garven Dreis a target lock and vice versus Garven Dreis takes a focus action, so when he shoots his torpedo, spends his focus, he immediately gives it to Dutch Vander who in turn does the same thing (shoots torpedoes with focus). Effectively allowing you to Target Lock, shoot torpedos with a focus all in the same round for both ships. Both ships are 6 pilot skill which ensures you can use them interchangeably. A really great combo and example of how synergy combined with ordinance can be very effective. The problem? You have selected 50 points worth of ships around synergy designed for a single torpedo shot from each ship. Once you shoot it your left with a base X-Wing and base Y-Wing unless you dump more points into them. This is where great combos like this really lose their luster, it is a great combo but you have to question its value when compared to alternative ways to spend 50 points and the plethora of ways you can create synergy between ships.

A sound rule for creating synergy based on ordinance delivery is to ensure that the synergy continues after the ordinance has been spent.

That said I think the reputation of Ordinance being “not worth it” stems from Torpedos specifically because of the core mechanical problem with them. You must spend your target lock and they are one shot effects. Aside from the one shot thing unless you target lock one round and shoot the next, you will be doing it without a focus unless you find a combo like the one shown above to alleviate that issue. I agree that this is an issue with torpedoes specifically (not necessarily ordinance in general). It is valid to say that if you are going to shoot a torpedo without a focus, in most cases your better off shooting your primary weapon with a focus even if you are rolling less dice instead.

Let’s look at how some of these torpedoes can impact a match.

Proton Torpedoes for example allow you change 1 of your focus into a crit. While the crit is nice, when you roll 3 red dice with a focus using your primary weapon your odds are not really much improved by rolling 4 dice without one. This is typical of shooting ordinance without a focus. That said however you do flip one focus to a crit and most importantly you can shoot at range 3 without your opponent getting an extra agility with 4 dice. That is the benefit here and it’s a pretty big one because in the opening round of a match you will be at range 3 in almost all cases for at least one round on the approach. A couple of even moderate Proton Torpedo hits against an opposing fleet in the early stages of a match may be all you need to soften up your opponent and domino yourself into a victory. I do think it’s a bit pricey at 4 points, but If you use Proton Torpedoes make sure that by round 2 they have all been fired at range 3. This is there secret, 4 dice, range 3 no agility bonus for targets. If you do it with a focus, you are practically assured of some successful hits.

Advanced Proton Torpedoes are probably the trickiest if not most difficult ordinance to use in the game next to bombs, but they can be made to effectively guarantee 5 hits. You have to be at range one, you have to spend your target lock and the only benefit of its special effect is to flip blanks into focuses (3 of them), which, If you don’t have a focus makes the special ability useless. Now you do roll 5 dice which can be devastating. The assumption here is that you target lock on the approach and focus on the round you have someone in your sights at range one. With a focus you are 100% guaranteed 3 hits and extremely likely to get all 5. It’s not always an easy task to get into range one and get someone in your arc, especially for ships that can fire torpedoes since they tend to be less maneuverable and far easier to arch dodge. At 6 points it’s among the most expensive gear cards in the game as well.

Again this comes down to combos and building synergy is all about reducing or eliminating the core problem created by the base gear in the case of Advanced Torpedoes especially. In this case its arc dodging, easily solved by Nera Dantels for example who doesn’t cares about arcs when shooting ordinance. Another fine ship for shooting short range torpedoes is Major Rhymer, same cost, he increases your range to a 1 to 2 making it much easier in particular for the dial friendly Tie-Bomber. Just a couple of combination in which this little piece of ordinance can be used to greater effect.

Even with its ability to shoot in a 360 degree arc you have to question the wisdom of using a B-Wing as a ordinance delivery system, especially considering the cost.
Is it worth it?.

We are back to the question is it worth it. Well I can say without hesitation that getting a 5 point hit on an opponent for 6 points is well worth it, always, especially if you choose your targets wisely. Since both ships have torpedo slots you can use Extra Munitions to turn 12 points of gear into 8 points of gear to potentially get two 5 dice shots. Not bad at all in my opinion.

Fletchette Torpedoes are also an interesting piece of gear because it’s so cheap and because its effect is guaranteed. Many people miss that there is no requirement to successfully hit to cause stress with Fletchette torpedoes, you simply need to fire it, so it guarantees that a ship with 4 hull or less will receive a stress as a result regardless if you get additional damage. If timed right this can be devastating and really Fletchette torpedoes are a reactive piece of equipment and one of the few that you can splash thanks to its low 2 point cost. You use it when the time is right, when giving your opponent a stress can cause critical problems. In X-Wing such opportunities happen quite frequently, in fact, it’s kind of a rare case when having a stress doesn’t cause you problems. For 2 points it’s a dirt cheap piece of gear to drop on rebel fleets in particular who have some many ships capable of firing torpedoes. I believe it to be one of the most cost effective torpedoes in the game when you understand how to leverage the impact a single unexpected stress can have on an opponent.

Now that’s not all of the torpedoes and perhaps I will do more articles talking about them in the future but suffice to say the reputation for ordinance being useless even when measured against Torpedoes is debatable at best. Missiles on the other hand, their reputation as useless is not deserved at all in my opinion. I will concede that missiles, like torpedoes require synergy and often very specific list building combos to be effective but missiles can be used to devastating effect and it doesn’t take much to make it so.

Missiles
The thing about missiles in my opinion is that almost every specific missile has a specific ship and in some cases, pilot that it’s really fantastic with. For the rest they may be so so or just plain bad, but that’s really the case with any equipment card. That might explain the reputation again here of ordinance being not worth it, but put the right missiles on the right ship and you can produce combos that are crazy game changers.

Cluster Missiles. The fact that you get to shoot twice in one round is already a substantial advantage to this equipment which I think is pretty good for almost every missile capable ship that mounts it. Cluster missiles however are fantastic on the Tie Bomber for several reasons.

Part of the reason is cost. 2 Cluster missiles with 1 extra munition on a low end (Scimitar Squadron) Tie-Bomber means that your Tie Bomber can potentially shoot 8 times in 4 rounds for a combined total price of 26 points. That is dirt cheap! Now grant it you have the “spend target lock” issue but there are a number of ways to address that from Squad Leader, Howlrunner or simply upgrading one of the ships to a Captain Jonas.

Proton Rockets. God I love the proton rockets. First and foremost you don’t need to target lock nor do you spend your target lock when using them which means when you shoot them you always shoot with at least a re-roll. Now there core ability is to increase their firepower when placed on high agility ships making it capable of getting it up to 5 dice. 5 dice if you can combo it to get a focus is … devastating even if you shoot it only once. Where do you put it?

The maneuverable and flexible A-Wings are the obvious and best choice, it goes without saying. It in particular works with an Airen Cracken with squad leader (great way to support ordinance ships in general). Perhaps less obvious is putting it on a Z-95. Sure you’re only up to 4 dice, but a bandit with proton rockets is 15 points. For all the complaints that ordinance is too expensive, that is dirt cheap and you can easily fit 4 Z’s in this fashion for 60 points and still have 40 points to play with.

On the Imperial side you really don’t have a good spot for them at the moment unfortunately. There is the Tie-Defender, which is already a bit too pricey in my opinion to mount missiles on it. The Tie-Advanced could do it, but it has the same issue as the defender, its already a bit pricey as is.

Tie Bombers can be fitted with them cheaply enough, but getting a Tie-Bomber into range 1 and in arc requires some doing and you may as well spend the extra points on a more powerful range one weapon if you are going to try it. In general though there is other ordinance that is fantastic for the Tie-Bomber for the same price.

The final one I will talk about is Homing Missiles. For 5 points you have a 2-3 range ordinance with 4 dice that does not require you to spend a target lock and prevents the use of evade tokens. This is a fantastic missile that works on almost every ship. One of the toughest things to do is to get a bead on high agility ships with evade and homing missiles are a great response. When you shoot a homing missile at range 3 you deny your opponent the bonus agility on top of everything.

Homing missiles have some really great synergy ships that they work particularly well on. Take for example the Z-95 combo of Airen Cracken with squad leader and 2 bandit pilots. You target lock with all 3 ships, then shoot with Airen Cracken in turn giving the other 2 ships 1 focus token each. Now you are shooting 3 Homing missiles, 1 with a target lock you can spend for re-rolls and the other 2 with focus and target lock re-rolls. That 12 dice with a high probability of hits and if you do this at range 3 you are not only denying evade tokens but the bonus for range to agility.

Grant it this is a 60 point combo but these ships continue to have great synergy after their ordinance is fired which is one of the rules you want to govern your ordinance/ship synergy selection.

Is it worth it. Well its debatable whether spending 60 points on Z-95’s is worth it, but if you get the hits early on this combo can really domino a match.

In conclusion. Well it’s hard to come to a conclusion. Ordinance is very expensive and being a one shot weapon requiring synergy to be effective even as a one shot weapon makes this the always questionable choice. There are a lot of great combo’s and lists one can build, it becomes tough to justify ordinance but in the same token I hope I have shown that its hardly “useless” as its often implied to be. There is a lot of potential to create complete havoc against your opponents with ordinance so unless you are an ultra-hardcore competitive player they are certainly viable. In competitive play I still agree with the general consensus that ordinance has yet to find a place in the meta, but in the same token the competitive meta excludes a great deal of things in X-Wing, excluding far more than it includes. To measure ordinance against competitive play is not really reasonable in your house games and it’s in house games the majority of X-Wing games take place.

I hope you found this article helpful and keep those questions coming, I’m always happy to have some fodder for more articles.

What Makes It Tick: Star Wars X-Wing Part V

It’s been a while since I have written an article for this series but I have received a number of E-mails from what I have gathered are new x-wing players requesting more and since I don’t actually usually get requests I thought I would fulfill the ones I do have. I thought about what topics I wanted to breach and decided to talk about the frequently disputed elements of ordinance and ordinance based ships. Typically ordinance is an element of the game often labeled “not worth the cost”, a sort of standard mantra at least in the competitive and online conversations about them. Today we will get into some details about the problems with ordinance and ordinance based ships and some hopefully clever tips on how you can leverage them to your advantage.

Ordinance
Torpedoes, Missiles, bombs and the ships that use them are often seen as risky propositions in list building, in fact in the competitive scene you will rarely see ships fielding ordinance and ships like the Tie-Bomber are also very infrequently if ever used in competition. The reason is quite sound. Ordinance weapons are one shot use weapons and typically, for the cost, the effect or impact on the game is considered too small to justify it.  At least that’s the theory.

So what are the listed problems or complaints about Ordinance?

Spending targets lock to fire them is just one of several issues with ordinance. Or do you, look closer, not all ordinance requires you to spend your target lock or focus.

The main complaint for starters is that you have to spend your target lock and really in the case of most ordinances this is the problem.   As you can see above however this is not always the case, I point this out early because its a common oversight.  You often only get one action so target locking someone which with primary weapons is used to trigger re-rolls is spent instead just to use the attack and rolling 3 or 4 red dice without a focus or target lock to improve odds means you are shooting at 50/50 odds. Even with various effects like getting two attacks, doing extra damage to nearby ships or triggering Ion effects there is a legitimate chance you will simply miss. By default hit or miss the ordinance is spent anyway. It’s like effectively shooting 3 to 5 points at a target. Consider the alternatives to spending 3-5 points on ordinance for something else like for example a push the limit (two actions – Focus and Target Lock) or Expose (increase primary weapon by 1), effects that can be potentially be used multiple times in a match. These effects increase your chances of getting more out of your primary weapons for the same price.  Its a valid complaint in my opinion.

Perhaps the most common use of the Tie-Bomber is the cheaper, Scimitar Squadron Pilot coming in at 16 points  Worth it until you see the dial.
Not terrible, but this is no doubt the least maneuverable of the Tie class ships.

There is also the issue of the ships that shoot the ordinance or at least are designed to do it well like the Tie-Bomber for example. The stats on these ships are generally fairly mediocre and you typically are going to need to put more than one piece of ordinance to make it formidable on the field. That of course increases the cost. More than that, if you really want to get some guarantees you have to use special gear to allow you to do that like Munitions Failsafe, Extra Munitions or combining it with other gear like Push the Limit so you could at least roll the dice with a focus or special pilots. All this amounts to increasing costs for a ship that when it runs out of ordinance (assuming it survives long enough to shoot it) is a lack luster performer without ordinance.

For the ships that fall somewhere in-between, ships not really designed for ordinance but have the option it’s even less worth it. Putting ordinance on an X, A or B wing increases the cost of a ship but typically these ships gain far more benefit from its primary weapons when combined with gear more specifically tailored for the ship. Your far better off with an advanced sensor on a B-Wing than you are putting torpedoes on it. Again because you will be able to use advanced sensors throughout the match, while the ordinance is a one trick, one shot pony, the value is fairly easy to determine. You could of course do both but the costs mount and you really have to question the value of things like proton torpedoes where you can roll 4 dice at 50/50 odds one time during the match or rolling 3 dice with a focus (or 4 dice if you are close range) every time you shoot.

Even with its ability to shoot in a 360 degree arc you have to question the wisdom of using a B-Wing as a ordinance delivery system, especially considering the cost.

Some might argue that ordinance is all about player skill, if you are good, the impact of having ordinance at the table can be devastating and that to a degree is true, but X-Wing is not just a game of a skill, it’s a game of dice and when it comes to ordinance bad luck with the dice is going to have far more impact on you than it would if you were firing your primary weapons. Besides in the end, the argument that it’s “not worth it”, is a direct reference to point cost. Simply put the cost of mounting ordinance on a ship is going to weigh in at around 10-20 points extra and that is practically a whole extra ship which means that in order to get the value from the ordinance you really need to be able to do the work of 2 ships with your ordinance ship, that’s a tall order! That ordinance, no matter how good you are, simply cannot do it.

Now with that said is there any circumstance in which it is worth it? I believe the answer is yes. Getting value out of ordinance is all about understand how you can leverage ordinance ships not against cost, but against strategical possibilities within the structure of your list and tactics of the game. Another words, a Tie-Bomber with Cluster-Missiles and Extra Munitions might not be cost effective, but if combined with a good pilot card and some bonus gear your opponent will have to address that ship or suffer the consequences. The concept is what I like to call, “rat trapping”, which simply means that you have created an obvious and immediate threat, this Is your trap and your opponent is the rat. He will walk right into your trap because he will see your munitions ship as a major threat and as such if you build the rest of your list with your trap in mind, the combination can be devastating.

With that said, let’s look at an example list.

The Tie-Bomber is arguably the worst of the ordinance ships and so let’s see if can create a list using it as a base for our rat trap.

Major Rhymer 26 (Push The Limit 3, Advanced Proton Torpedoes 6, Extra Munitions 2).

The ability to increase range makes using Advanced Torpedoes more viable for this Tie-Bomber that is unlikely to ever get someone in their arc at range 1 given its dial.

You might immediately see how dangerous and expensive this ship is. At 37 points its death on wheels for at least 2 rounds. You have push the limit to assure you can target lock and focus, you have advanced Proton Torpedoes that can fire at range 1-2 that combined with a focus all but assures you are going to get 5 hits (3 blanks turn to focus, you need only to roll 2 hits with a focus at about 75% odds). Extra munitions that turns a 6 point piece of gear into a 2 point piece of gear.

Now this is a vulnerable ship but there is no question that your opponent will do everything in his power to eliminate it early, he will see this ship as a major threat and rightfully so because it is. If allowed to shoot, it’s going to earn its weight in points. He is your trap and you want to leverage your trap by creating the rest of your list knowing what he is going to go for.

1 x Tie Phantom (Sigma Squadron) 25 + Fire Control System
3x Tie Fighter (Academy Pilot) 36

Most people go for the expensive Phantoms, but the Sigma Squadron Pilot at 25 points is dirt cheap for a ship that can cloak and rolls 4 dice even at long range. Especially when you consider its dial.
Consider the Interceptor dial, a ship widely accepted as being incredibly maneuverable.
The Phantom is pretty comparable to the Interceptor. The only real trade up is boost for cloak. Make no mistake its an arc dodger with fire-power.

All you need to do is position these ships (your core squad) away from Rhymer to ensure that anyone going for him, is going to have to turn their back to the rest of your ships. With some good piloting and careful use of the Tie Phantom and at least one clean shot with Rhymer you should be able to gain an early advantage against most lists.

Now tactically you have many options with this list. Once Rhymer uses his ordinance, he is your blocker. Crash him into stuff and make him a nuisance setting up shots for your other ships. If your opponent chases the phantom or the Tie-Fighter play the avoidance game, evade, cloak and bug out forcing him to waste shots and buying you time to get Rhymer into position. With Rhymer you want to target any low agility ships, or core support ships or big easy to hit ships. Make that those 2 (5 dice) shots count if your opponent doesn’t address Rhymer. Most importantly remember however that Rhymer is not your fleet, he is your distraction, he is the ship that will put your opponents ships out of position and into your trap.

Is this a good list? I suppose we could argue about it, but it does show how the Tie-Bomber and ordinance can in fact have its uses and while this list isn’t what one might call ultra- competitive, it does certainly have a lot more going for it than just reliance on ordinance. The ordinance in this list is really just a ruse if you will for getting the actual threat (1 Phantom and 3x Tie Fighters) into position. The hope is that your opponent will not realize that the munitions ship, that Tie-Bomber is not really the big threat.

The Conclusion
Ordinance is not terribly cost effective, in fact the argument that it’s “not worth it” certainly has some validity and I mostly agree with it. X-Wing list building and in general playing X-Wing is about creativity and fun for most of us, so if you simply step out of the competitive number crunching (Math-Wing) and think outside the box a little, ordinance presents an interesting challenge to players. Can you create a great list that works with ordinance, I believe the answer is yes. I have had success with the list above, not because it’s a great list but because it’s unusual enough that your opponent is stumped on how to address the challenge. Do you split your fleet, do you go for the Tie-Bomber or focus on the Tie-Phantom.

I think meta thinking is part of the reason ordinance has such a terrible reputation in the competitive circuit, in fact, I believe that if you took a list like this to a tournament you would probably do quite well simply because of meta thinking. When everyone is expecting one of three or four meta lists and they are facing something unusual, it throws chaos into the their tactical expectations and this your advantage. I personally love flying lists like this, the look on your opponents face is all the reward I need.